
[AC Unity] Bottom of the Barrel - Stealth Kills
Fri, 08/19/2016 - 00:25 — Leo K
[Front-paged. -stabguy]
Assassin's Creed Unity
Memory: Bottom of the Barrel
Style: Reaper / Lethal / Stealth Kills
Arno, hungover, stealth kills a bunch of guards because he wants to steal their wine. Then he goes on a murderous rampage because some other guards stole the watch his father once gave him. You don't mess with Arno's watch.
***
The wobbly and grey effect on the camera in the first part of this mission, and the similarly blurry effect on the camera in the second part of the mission is because Arno is drunk, and later, hungover. If you use Eagle Vision during this mission, Arno's head will hurt, and, because of the visual and audio effects that accompany it (screen distorted by sharp/saturated colors, ringing in ears sound effect) your own head will hurt too.
Thankfully no Eagle Vision was used during this video, because I won't subject viewers to that, even though I do appreciate the little detail that Ubisoft tacked on.
This mission's actually quite tough, believe it or not, except for the last part, where all the guards are just positioned by the Level Designer(s) in such a way that you can just play "Connect-the-Dots" with them, quickly Stealth killing them all one after the other just by killing one, walking to the next one, killing him, walking to the next one, etc.
Coming up next, sometime in the next two days is a video of the same mission, but with No Kills and No Detects... If I can actually do it. I'm not sure if it's even possible, but we'll see.
Hope you enjoy.
Safety and peace.

[AC Unity] The Kingdom of Beggars - Ghost (No Kills/KOs, No Detects)
Wed, 08/17/2016 - 14:07 — Leo K
You are missing some Flash content that should appear here! Perhaps your browser cannot display it, or maybe it did not initialize correctly.
[Front-paged. -stabguy]
Assassin's Creed Unity
Memory: The Kingdom of Beggars
Style: Ghost / Non-Lethal / Flawless
Goal: Finish the mission without being detected, without killing anyone, and without knocking anyone unconscious. A phantom. A bedtime story the guards tell themselves at night, a myth. Nothing more.
***
A long time ago I'd made a video of this, but it got deleted for some reason, so I decided to make a more interesting version that uses more of Unity's mechanics. Next up is Ghosting La Halle aux Bles, which was surprisingly easy to figure out for a mission that seems so intimidating.

"They Make It Look Easy" -- A Short Guide on Making Stealth Game Videos
Mon, 08/15/2016 - 19:03 — Leo K[Front-paged. -stabguy]
This guide uses this video as an Exemplar: http://thehiddenblade.com/ac-unity-kingdom-beggars-stealth-kills
It is not required viewing, but may help.
Table of Contents:
- Knowing the "Rules" - Understanding Stealth Mechanics (or: Detection Mechanics)
- Detection Meters, Detection Behaviors
- Items, Player-Verbs, Tools or Mechanics that Interact with Detection
- Understanding Kill Animations
- Special Cases/Unreachable Targets
- Practice and Skill Transfer
- Playing Non-Lethally
***
Knowing the "Rules" - Understanding Stealth Mechanics (or: Detection Mechanics)
***
The first thing needed is a deep understanding of the game's Stealth mechanics.
"Stealth mechanics" is a vague term, but what I actually mean when I say this is, "You need to understand as much as possible about everything that interacts with Stealth or affects Stealth in this game."
Going a step further, what *that* actually means is, understand everything that affects *Detection*, since Stealth is actually your Default State. Normally you're in Stealth all the time anyway, so you don't really do anything to "stay" in Stealth. A better way to think of it is that you make mistakes or allow things to happen, which *change* your state into Detected.
Understanding how Detection works, what causes it, what slows it, and what stops it is the first step.
***
Detection Meters, Detection Behaviors
***
In AC Unity, guards use a three-phase Detection/Awareness Meter. For our purposes, it's a two-phase meter since the third phase is being Exposed/causing an Alert, which for this kind of video is considered an instant failure.
In Phase 1: The guard sees the Assassin, and their Awareness begins filling with Yellow. Breaking Line of Sight with the guard before this phase fills up will cause them to stare in the direction you were last seen in, but they will not Move from their position. Phase 1 filling with Yellow completely will transition to Phase 2.
In Phase 2: The guard has looked at the Assassin for long enough that they're starting to become super suspicious of them. In Phase 2, the guard's Detection Meter begins filling from the bottom again, but this time, with Red. Breaking Line of Sight with the guard before this phase fills up will cause a Last Known Position Hologram to appear, and the guard will then walk to that spot to investigate who you are. Phase 2 filling with Red completely transitions to being Detected/causing an Alert. Playing with this Phase is important, as it allows you to manipulate guards. It also feels like playing with fire, as staying in sight for too long voids your run.
NOTE: In Assassin's Creed Unity, there are special zones called Restricted Areas. Gameplay in these zones is the same as everywhere else, with one exception: Guards who spot the player IMMEDIATELY go into Phase 2 Detection. The premise is that, since they've been told to keep everyone out regardless, even a glimpse is enough to get them instantly suspicious.
In this video, I use this knowledge, combined with knowledge that the Guard will move to my Last Known Position, to let a Brute glimpse me for a moment so I can drag him out toward a doorway and assassinate him there, right before dual assassinating his two allies inside the building.
Hasta la Vista, Samuel Smith
Sun, 08/14/2016 - 18:22 — aurllcooljay
You are missing some Flash content that should appear here! Perhaps your browser cannot display it, or maybe it did not initialize correctly.
[Front-paged. -stabguy]
An assassination on the second Rogue target, using a grenade from one of his own guards.
Setup
Samuel Smith is half surrounded by guards. The only one you want alive is the brute, but kill the others before they get in the way. You don't have to worry about the target because he just stands there, too afraid to run or fight.
When you first get into combat, the brute usually throws a grenade. If that fails, you'll have to either escape open conflict or climb somewhere. In my case the brute prepared to throw a grenade, but changed his mind and attacked me. When he does throw a grenade, make sure you're close enough to the target.
I noticed one time when he saw a dead body, the brute threw a grenade at a haystack, so if you could find a way to move the target closer to the haystack, you could do this without ever becoming detected.

AC2 finished in 5:10:31
Tue, 07/26/2016 - 18:49 — Fed981
You are missing some Flash content that should appear here! Perhaps your browser cannot display it, or maybe it did not initialize correctly.
[Front-paged. -stabguy]
Hello guys, here's my new and augmented run of AC2 (any%). As almost usually I will paste my general comments here. I'll be glad to get your feedback!
playlist: https://www.youtube.com/playlist?list=PLAAB3xSA3bP2sY7ajTxm8_zT53ChFPGzM
seq. 1: https://www.youtube.com/watch?v=04SqIiAVX8Q
seq. 2: https://www.youtube.com/watch?v=oOeMq9vqmrg
seq. 3: https://www.youtube.com/watch?v=_DEg1lYiMAU
seq. 4: https://www.youtube.com/watch?v=N8iBW6sHhto
seq. 5: https://www.youtube.com/watch?v=5lwE5pjmvQ4
seq. 6: https://www.youtube.com/watch?v=ZDM-phsRFn8
seq. 7: https://www.youtube.com/watch?v=KAGTrDJk0mM
seq. 8: https://www.youtube.com/watch?v=IBBGb8a-bcQ
seq. 9: https://www.youtube.com/watch?v=Lr0_1NMzfJw
seq. 10: https://www.youtube.com/watch?v=H4dyYbh-Iow
seq. 11: https://www.youtube.com/watch?v=-CdIU-DHmo0
seq. 12: https://www.youtube.com/watch?v=5_35fc5O2QQ
seq. 13: https://www.youtube.com/watch?v=1JxdRgAxMjA
seq. 14: https://www.youtube.com/watch?v=-xaGzZuq5LI
Welcome to the speedrun of Assassin's Creed II in 5 hours, 10 minutes and 31 seconds. It was recorded between April 3rd and June 22nd (2016). Also, this is my second run of this game and that category, although the first was now five years ago and did not feature any save warp.
I wish to address many thanks to MAGLX, Ectortutu, the whole team from TheHiddenBlade, the SDA team, and all people who supported me when I recorded.

The Early Death of Hope Jensen in Sequence 2 Memory 5
Mon, 07/11/2016 - 15:40 — aurllcooljay
You are missing some Flash content that should appear here! Perhaps your browser cannot display it, or maybe it did not initialize correctly.
https://youtu.be/JVjKZYpQmkI
[Front-paged. -JoeyFogey]
In sequence 2 memory 5 Freewill memory, Shay goes against the assassins. Here is how to assassinate Hope in this mission.
Roaming outside the Mission
After the scene where a gunshot collapses the path between two hills, you can backtrack by going around. Climbing up the hill can be tricky at first because Shay can only go up short ledges. With tall ledges he'll do a wall run but can't pull himself up.
On the original run from the cutscene, some fallen burning trees block the way, but reloading the checkpoint gets rid of them.

We the People: Early Death and Dead on Arrival
Sat, 06/25/2016 - 20:59 — aurllcooljay
You are missing some Flash content that should appear here! Perhaps your browser cannot display it, or maybe it did not initialize correctly.
https://youtu.be/mW6FrW6-urI
[Front-paged. -JoeyFogey]
In the James Wardrop assassination.
Early Death
Near the beginning you observe Benjamin Franklin giving a speech. Guess who's also attending? AC3's Templar target William Johnson.
Ranged weapons have no effect on him, and you can't get close enough to assassinate without starting the scene. Actually there was one time I was scaling the building and the game let me air assassinate him, but all other times since then I was never given the option.
Berserking a civilian might lead to Johnson's defeat, but the NPC will have to be pretty close to him because of an invisible barrier. The civilian might also attack one of the other civilian's, although it's usually Johnson they go after.
Of course he respawns for the scene, but the same can't be said for all the civilians who got spooked away.
Dead on Arrival
Assassinate the target James Wardrop as soon as he appears. First you have to kill a messenger before he reaches the target, or you fail the mission. to do this right you have to delay the messenger's death so you can get inside the fortress and lay wait for Wardrop.
It was during this I discovered you can pick up sleeping bodies in Rogue. Carry the messenger as far as you can on your way to the inside to avoid getting too far away. The messenger will continue his roue to the front door. Once inside make your way along the roof to the front and berserk him.
Now wait in the tall grass. At first I tried killing all the guards inside, but that was overwhelming with such short time. So I chose to make the fight each other so I wouldn't get noticed. Holding down  , Shay will kill the target as soon as he spawns.

Charles Dorian Assassination Variety Pack
Tue, 05/31/2016 - 01:01 — aurllcooljay
You are missing some Flash content that should appear here! Perhaps your browser cannot display it, or maybe it did not initialize correctly.
[Front-paged. -stabguy]
Speedrun
The fastest way I found of running through the memory. Starting at th first checkpoint, you would think the first place to go is the front of the building to start the scene, but as it turns out, you can go right to the window, skipping the first part.
The next part is tricky because of the no detection requirement. Try to blend right away when entering the first room to avoid being seen. I assassinate a guard whose patrol route takes him to the next room to save time, but didn't dare run when a guard spots me.
Jumping straight ahead from the window you usually land right in front of the guard, but can run behind a pillar before his detection meter fills all the way. From there it's easy sailing just running to the target. A small scene makes you temporarily lose control of Shay.
Charles Finds His Son Arno
Lead Charles to where Arno and Elise are. Coincidentally, this make Charles stop calling for his son.
Slightly Early Death
When you first reach Charles in the building, he normally can't spot you until after the scene, but if you make him respawn by going far enough away and coming back, his AI is reset. Now you can make him follow you without starting the scene and kill him, but have no way of progressing.
Deja Vu Death
If you restart the checkpoint after reaching the final part of the mission (has to be on a run from the start of the memory), a strange glitch occurs. The option at the beginning of the memory of infiltrating the place appears, along with the original Charles and Arno Dorian at the front of the building! Killing Charles Dorian 1.0 has no effect on the memory.
Stunt Assassination
The nostalgic jumping from a great height to instantly assassinate a target. Using the "deja vu" trick, the front door is open. Now you can set the target up for a stunt outside the building, which shouldn't be possible.
Scaredy-Cat Charles
An extra. The original Charles Dorian has the AI of a civilian and runs away if you bump into him.
Devil's Acre Gang Stronghold: Silent Extermination
Thu, 05/26/2016 - 01:42 — stabguy
You are missing some Flash content that should appear here! Perhaps your browser cannot display it, or maybe it did not initialize correctly.
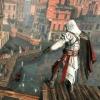
Regardless of which Assassin's Creed title, my favorite style of play is always stealth and the hidden blade. No swords, guns, poison or bombs. No whistling or calling in recruits. Just me and the hidden blade for some up close and personal kills.
In Syndicate I kept failing these Gang Stronghold missions which say "Free and protect captured Rooks". At first I thought it was due to a lookout finding a dead body, leading to the Rooks being executed. That wasn't it at all.
It turns out that each Rook is guarded by a single Blighter. When you kill that guard it automatically frees the corresponding Rook, who promptly attacks the nearest Blighter and usually gets himself killed. Even if the Rook survives, it blows my plan for stealth and for killing everybody myself.
One thing that sometimes works is to immediately Recruit ( ) the freed Rook, lead him away from Blighter territory, and Disband (hold
  +
+  ). However, the Rook often sees a Blighter and attacks instead of following Evie. Other times he later wanders back into Blighter territory and gets into trouble.
In the video above I save the three jailers for last. The first is assassinated in low profile because the Rook isn't freed until she hits the ground. This gives Evie a head start toward the second jailer, who is air assassinated to avoid having to wait for him to turn his back. The third jailer waits with her back to a second story window. I flubbed my first attempt at a ledge assassination and was lucky that the two freed Rooks did not engage her. Trust me: it happens.
The other challenge was getting this procedure down to 5 minutes so that it could be recorded with a single Xbox DVR clip.

Hullo Mr. Gatling: Full Sync Blitz
Wed, 05/25/2016 - 04:23 — stabguy
You are missing some Flash content that should appear here! Perhaps your browser cannot display it, or maybe it did not initialize correctly.
This project started out as a full sync guide and evolved into a speedrun. I demonstrate how to mow down Blighters, not how to pop in and out of cover. The result is the same: 100% synchronization.
Don't take any damage
The first thing you should know about getting full sync is that "Don't take any damage" only applies until the train pulls away from the station. Don't get discouraged. That's less than 2 minutes (in this video it's only 1:25).
The second thing is you should take advantage of "Reload last checkpoint". Doing so will give you more time to unjam the gun and take aim. The first wave of blighters will run down the hill across the tracks where they can be picked off before they get into position.
Memorize the order in which the Blighters arrive. They don't shoot until they reach their position and have time to take aim. If you can kill them in order it isn't hard to stay ahead of them and not let any get off a shot. Also, try to save explosive crates for later.
Snipers
When Nigel says, "They're on top of us." a series of three snipers arrive. The first is on the roof to your right, the second on the train station roof to your left, and the third back on the same roof as the first. This is a good time to use explosive crates for the Blighters on the ground. It gives you more time to aim at the snipers.
